Unreal: How to Use ListView in 4 Easy Steps
Sure, there are tutorials out there showing how to use ListView works but how many do understand it? This guide shall help you out!
For a quick entry, just skip to Step 1.
Understanding ListView
In order to implement a ListView you require two separate blueprints or classes that serve different roles: A widget component, that defines how the data is updated and a blueprint that defines the data. Inside the widget component you can define how the widget deals with the supplied data structure.
The reason why this is being done is to decouple view and data (reminiscing of the MVC pattern). That makes ListView a generic list implementation that can display vast amounts of information, regardless of data model and entry widgets used. The functionality, e.g scrolling and selection mechanisms, stays the same.
It also works with more complex widgets, e.g. combinations of icon and text. It looks like it could also be used to implement lists of whole panels, if you wanted to.
The following image shows roughly how ListView is structured. We will be implementing the green parts in this guide.

Before you bother implementing your own list you should try getting ListView to work. The functionality it offers, such as proper selection or scrolling, aren’t trivial problems to solve and can be more difficult to implement than you think.
It can make sense to create your own if you need a really really simple and light-weight list implementation.
But, let’s continue on how to use ListView.
Before starting, suppose you placed a ListView into the designer. Your screen should look something like this:
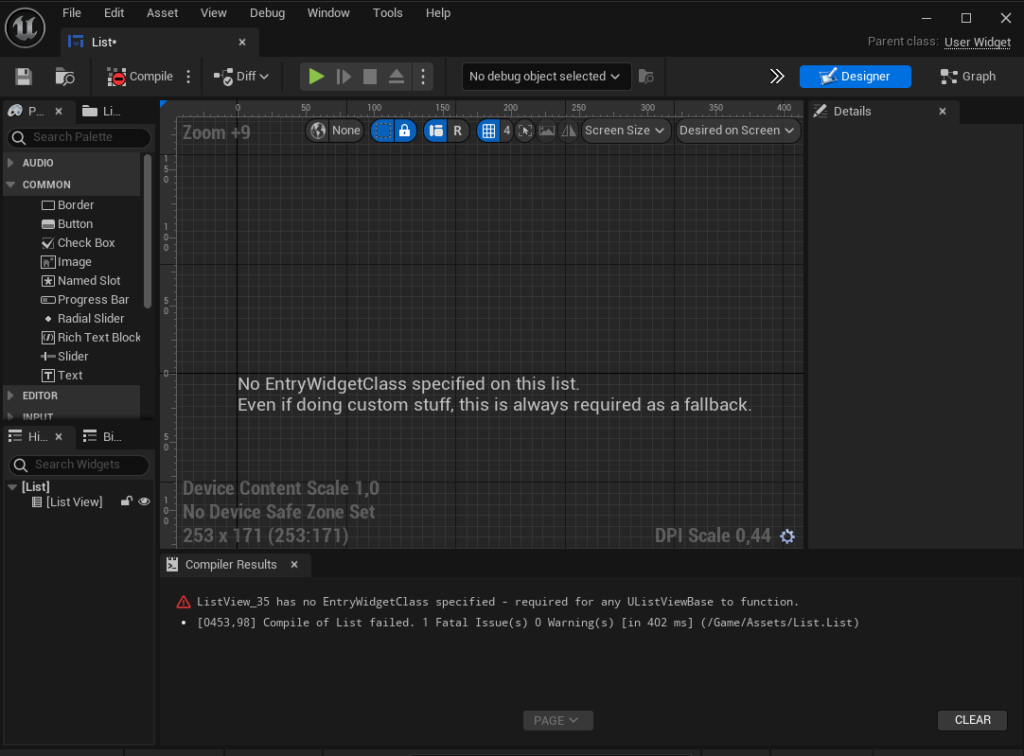
A warning shows up in place of the expected list. Now If we hit compile, we are also getting an error.
Now what?
The editor tells us to specify an EntryWidgetClass. So this is what we will do.
Step 1: Set up the User Widget
- Create a new widget class, let’s call it
MyListEntry. - In the Event Graph click on the button Class Settings.
- Add the interface
User Object List Entryto the widget, like so:

- Add a
VerticalBox. Place Text and Image into theVerticalBox. Make sure both text and image are available as variables, i.e. is Variable in the details panel must be set to true for each.

- Navigate back to where you added your
ListView, expand List Entries and defineEntryWidgetClass. - This gets rid of the warning and you should be able to compile now.
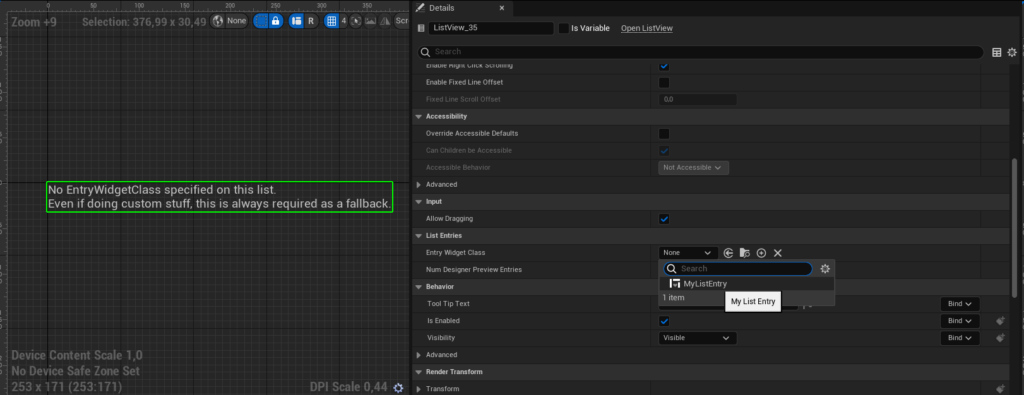
Step 2: Set up the Model
- Create a blueprint that has Object as parent class. Let’s call it
BP_MyListData. - Add two fields to the blueprint: one for Text, and another for an Image; these are being used to update Text and Image of our
MyListEntryWidget.

- This blueprint does not need to inherit any interface. Being a model, this blueprint only serves the purpose to update your widget.
- Any additions must reflect on both widget and the data blueprint. In that
ListViewcan be tedious to maintain.
Step 3: Define the Events
- Navigate to the
MyListEntrywidget. Open it. - Expand Interfaces > Object List Entry, double click on On List Item Object Set to Implement the interface.

- A new node appears that looks like so:

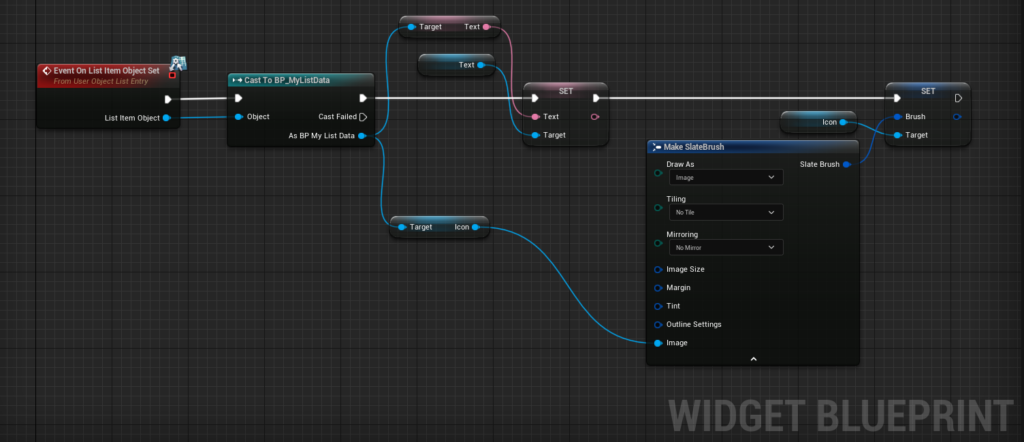
- The parameter
List Item Objectis the data model we created previously, that means theBP_MyListDatablueprint. This allows you to update the widget when the content changes (e.g. when scrolling) in whatever shape you need. - Add a cast node to cast it into
BP_MyListData. - Add the logic that updates the widget with the supplied data. Because of Slate, we have to do some extra work to get the icon working.
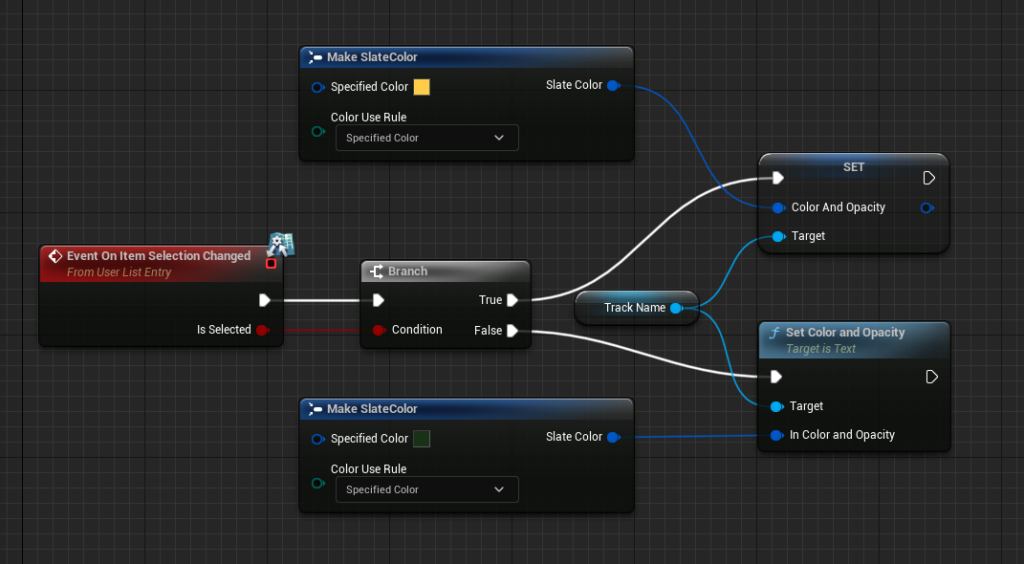
- If you want the entry to react to selection changes, create a binding to
On Item Selection Changeand change the slate color like so:
Step 4: Add Items as Model
- Create a new function
Make ListDatato create instances ofBP_MyListData, like so:
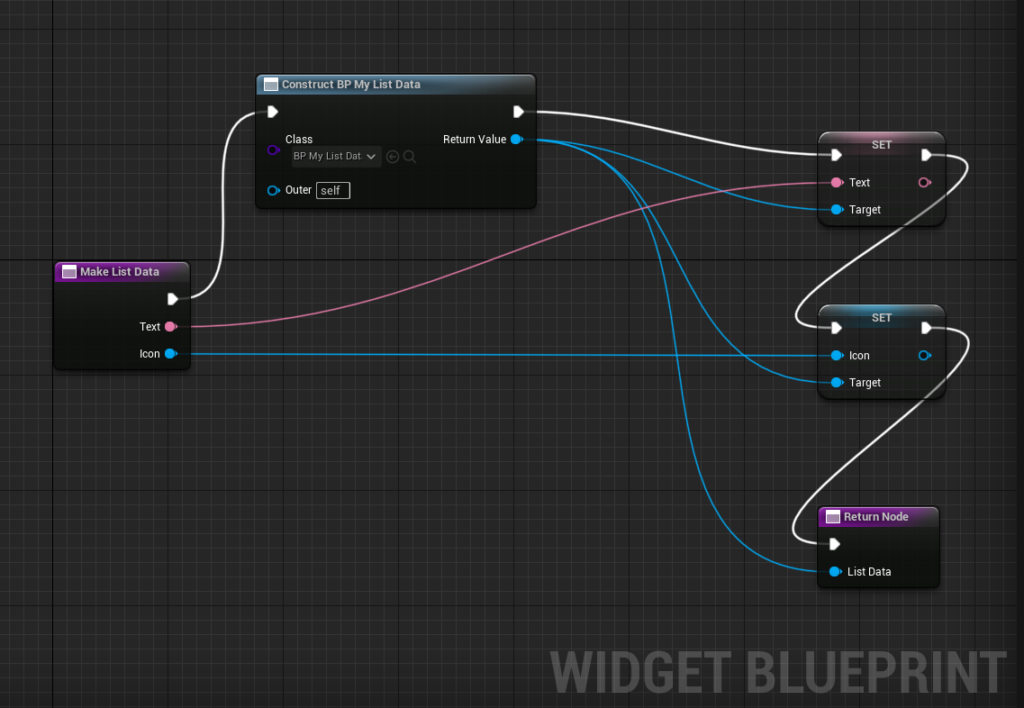
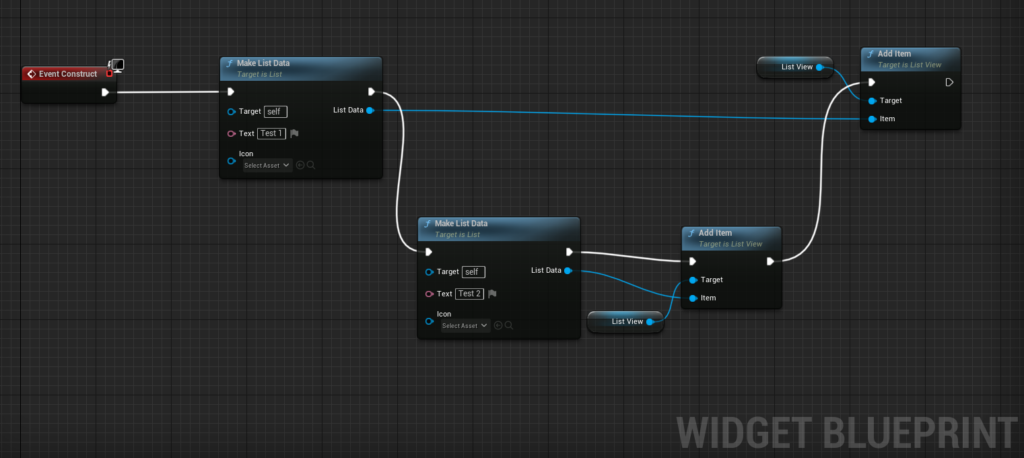
- Finally, use the Add Item node to add entries to the
ListView. Keep in mind with this node, you add instances ofBP_MyListData, notMyListEntry! - For testing, you can add them inside the ListView for example like so:
The Catch
This example has a little “flaw”: I can freely set the image in BP_MyListData, but if calling the function, Make List Data (that allows me to select an image asset), no image assets are listed.
Hope this article helps on your gamedev journey!
Do you have any feedback or questions? Feel free to let me know in the comments!
I appreciate the opportunity to help or improve.
